In this article, we will explore how to create text-only message templates, media-based message templates, and templates that include variables. If you’re unfamiliar with message templates, be sure to check out our article on the subject.
Before diving into how to create the templates, let’s explore the anatomy of a message template.
Elements of a Message Template #
Message templates are rich in features and consist of various components, including the header, body, footer, and buttons. Let’s examine each part in detail.
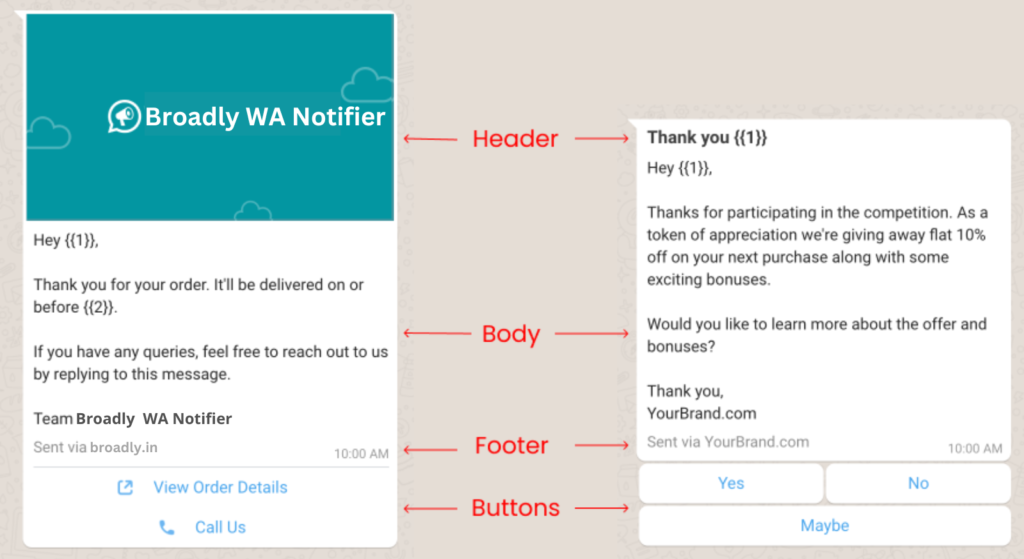
Header #
A message template can include two types of headers: plain text and media.
Plain-text #
When you select header type as text, the text appears on top of the message in bold. The header text can have a maximum length of 60 characters. You can also a variable {{ 1 }} to this text to personalize the header text. We’ve covered how to use variables in this article: Personalize Message Template with Variables.
Media #
In case you select the type as media, you have three choices of media that you can put in the header:
1. Image
2. Video
3. Document
You can include a maximum of one media item in a message template. The media you upload during the creation of the template serves as a placeholder and can be replaced with different media when sending the template.
Header is an optional field.
Body #
The body of the message template is where you include the main text content. You can add up to 1,024 characters of text. Additionally, you can use formatting shorthands to enhance the appearance and readability of the text.
1. Bold: *text* will make it bold.
2. Italics: _text_ will make it italicized.
3. Strikethrough: ~text~ will make it text
4. Monospace or code: “`text“` will make it text
Similar to the header text, you can also include variables in the body content. There is no limit to the number of variables ({{ 1 }}, {{ 2 }}, {{ 3 }}, etc.) you can add to the body text, provided that the total content remains under 1,024 characters.
Note that body text is a required field.
Footer #
You can include footer text in your message templates, with a maximum limit of 60 characters. However, variables cannot be added to the footer text.
Typically, businesses use the footer to display their name or include messages such as “Reply STOP to unsubscribe” to guide users on specific actions. The footer text is optional.
Buttons #
You can also include buttons in your message templates, with a maximum of 10 buttons allowed. Here are the different types of buttons you can add:
1. Call to Action – You can add different types of buttons like Visit Website, Call Phone Number, Copy Offer Code, View Product Catalog and so on.
2. Quick Reply – You can add quick reply buttons with short text (with upto 25 characters). When your customer clicks on any of these buttons, the text is sent back to you on chat.
Buttons are optional and you may or may not add them in your templates.
Now that we’ve looked into the structure of a message template, let’s look into how to create one in Broadly WA Notifier.
How to Create a Message Template? #
At Broadly WA Notifier, we offer a comprehensive dashboard for creating message templates. Alternatively, you can create templates directly in the WhatsApp Manager and then retrieve them from your Broadly WA Notifier dashboard.
In this article, we will explore how to create a template using our dashboard.
Let see the exact steps to create a message template:
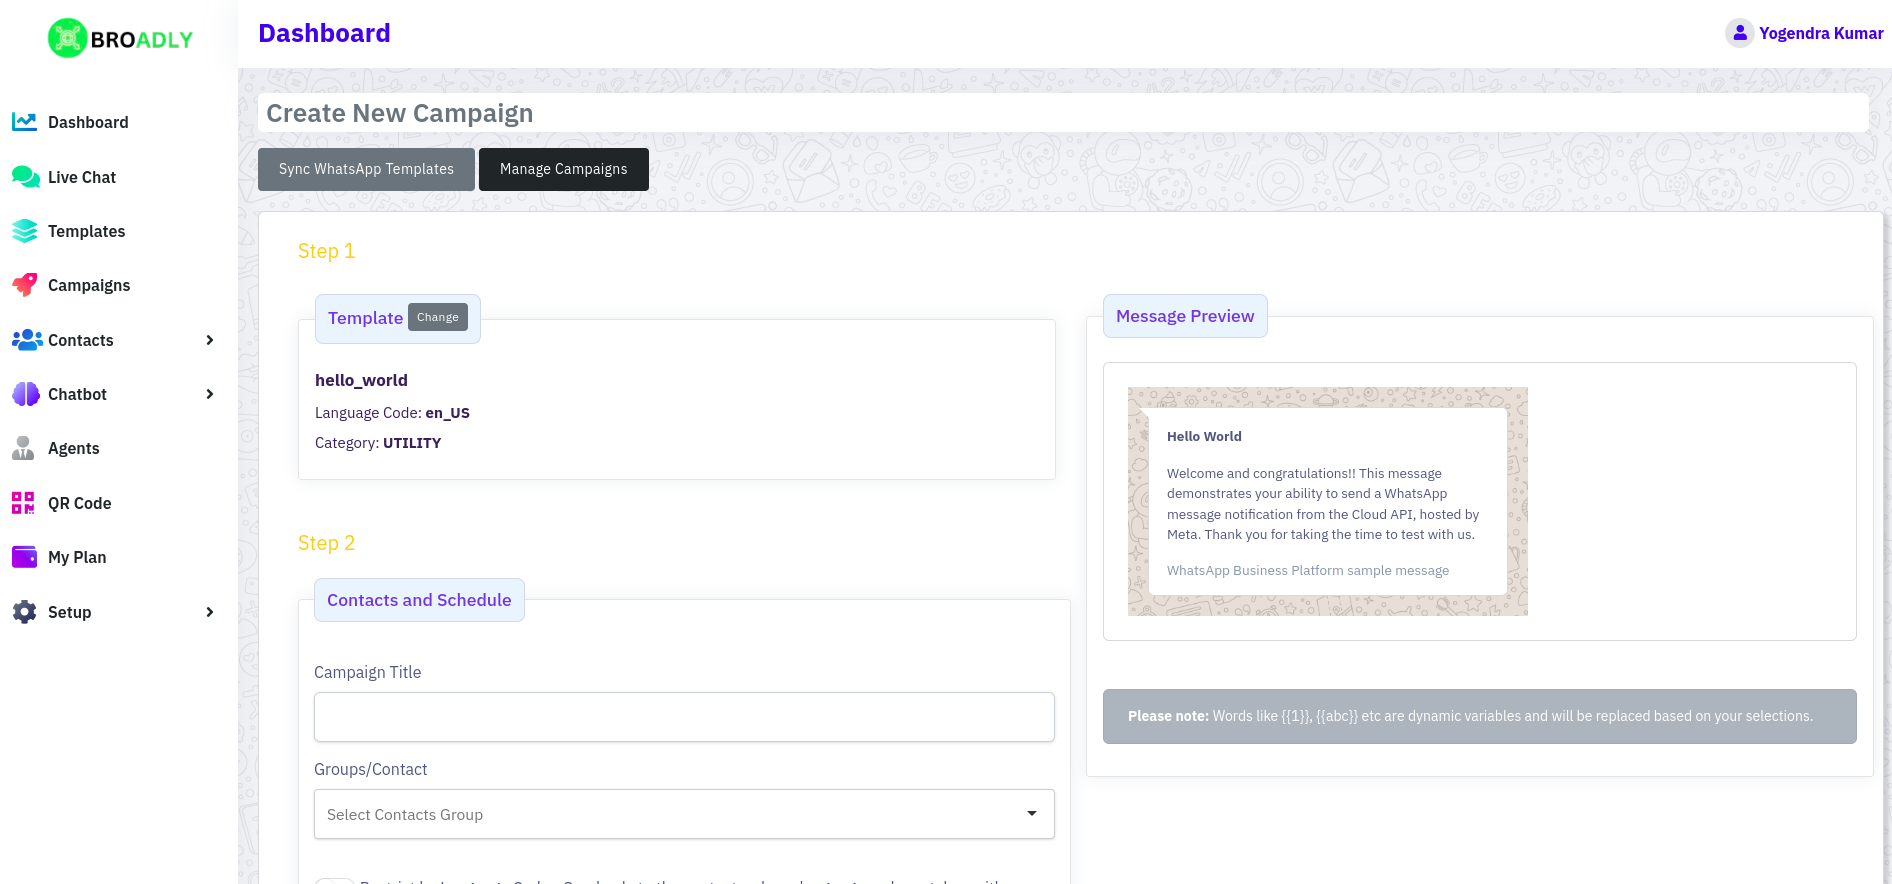
1. Login to your Broadly WA Notifier account.
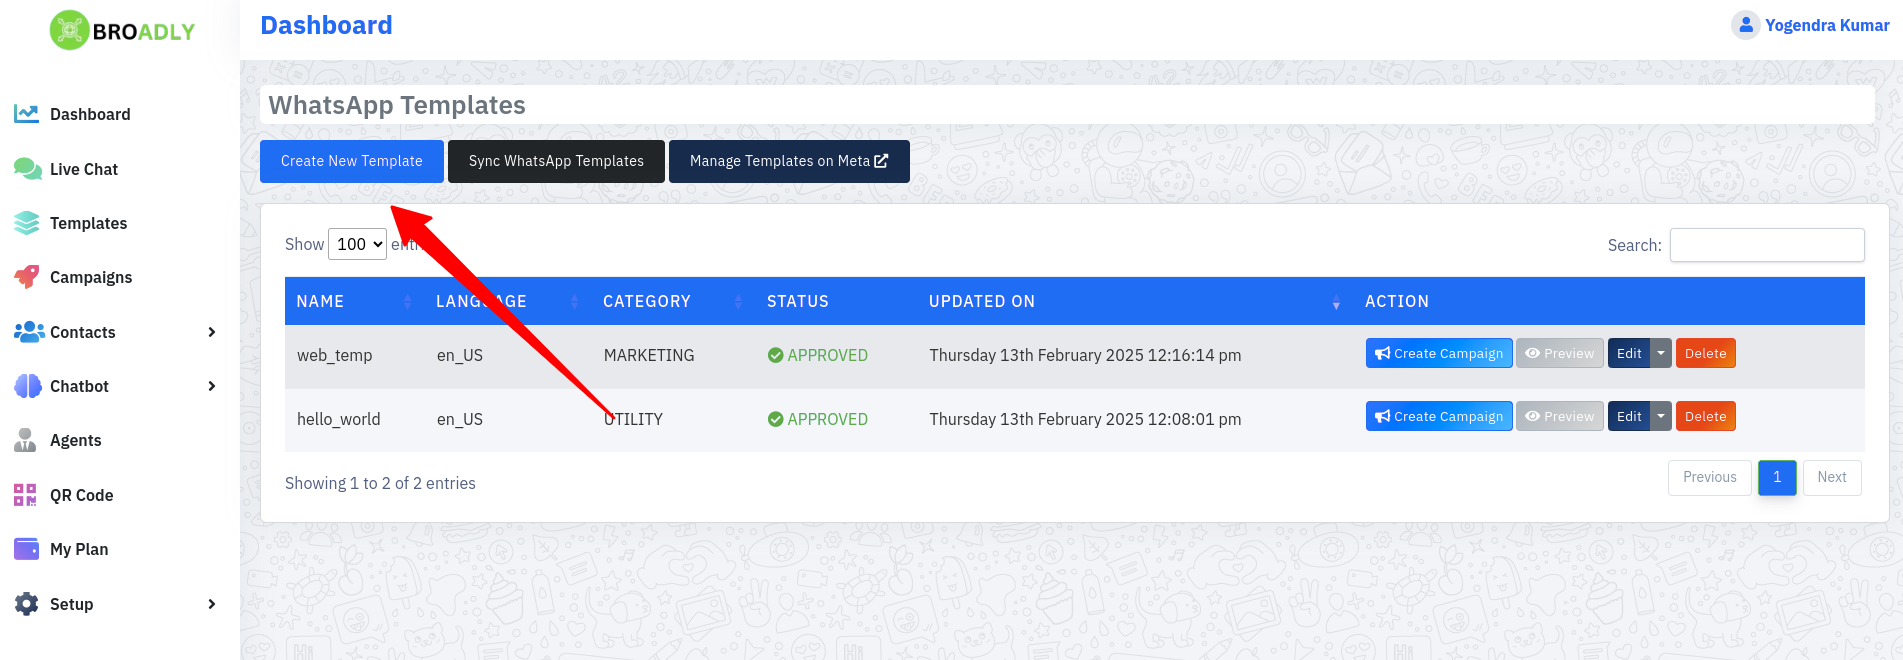
2. From the left sidebar go to the Templates & use Create New Templates option.
3. In the Template Name field enter a name for the template. Note that the template name can only have alpha-numeric characters and underscores. Also the whole name must be in small letters.
4. Enter the template language code in the textbox.
5. After entering the template language, select category from the Category dropdown. Note that it’s important to select correct category for your templates to avoid rejection by WhatsApp.
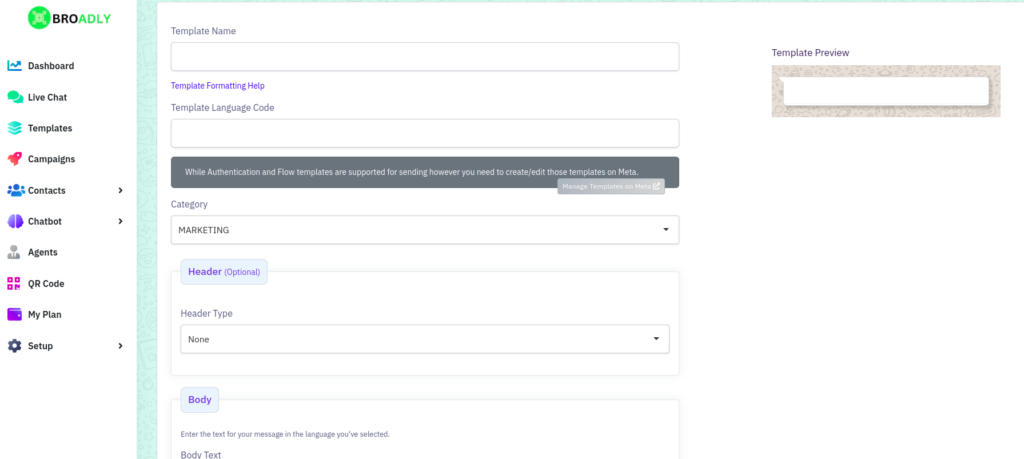
6. Now from the Header section select the Header Type. You can select from either Text or Media or leave it as None if you do not want header in your templates.
Text – Selecting this type enables a new field, Header Text, where you can enter up to 60 characters. Additionally, you can include one variable {{ 1 }} to personalize the header text.
Media – Selecting this as the header type allows you to choose a Media Type from three options: Image, Video, or Document. Pick the one that best suits your needs.
After selecting a Media Type, an Upload button will appear, allowing you to upload your Upload Example media. This media can either be sent as-is (e.g., a promotional image or video) or customized for each message (e.g., PDF invoices). If you need to send unique PDF invoices with each notification, be sure to upload an example PDF that matches your invoice format.
7. Once the header is set up, you can add your text content in the Body field. Ensure that the content follows WhatsApp’s Message Template Guidelines. You can also include variables such as {{ 1 }}, {{ 2 }}, {{ 3 }}, etc., and map them to actual data when sending a notification, as explained here.
When you add variables in the Body text, Sample Text fields will appear below for each variable. You must provide sample dummy data for the WhatsApp team to review and understand the type of data you’ll be sending. This sample data is not saved in your template; it is only required for the template review process.
8. Next, you can add Footer text to your template. This is typically used for your business name or a general message for recipients, such as “Reply STOP to unsubscribe”, which can be configured with our Unsubscribe automation. The Footer field is optional, so you can leave it blank if not needed.
9. The final section is for Buttons. You can either leave this section empty if you don’t want to add buttons or click on Add Button to include up to 10 buttons.
10. Once you’ve completed all the steps, click the Submit for Approval button on the right-hand sidebar. A confirmation popup will appear—click OK to submit your template for approval.
After submitting the template, it is saved in our portal and sent to WhatsApp for approval. The review process can take anywhere from 30 minutes to 48 hours. You cannot use the template until it has been approved by WhatsApp.
Since the review process takes time, it’s important to follow WhatsApp’s Message Template Guidelines when creating your template. This helps reduce the chances of rejection and speeds up approval.
Ensure that your webhook setup is completed (refer to Step 4 in this article) on the Meta portal. This allows WhatsApp to send notifications about template status changes. Without this setup, you won’t receive any updates from WhatsApp.